Step 8: Create Your First Automation
Build a visual automation rule using the Rule Chain Editor.
Full reference
For complete details, field tables, and limitations, see the Automation Rules reference.
What is a Rule Chain?
A rule chain is a visual program that reacts to changes in your data and performs actions automatically. Instead of writing code, you connect nodes on a canvas, and data flows from left to right through your chain.
Opening the Rule Chain Editor
Click the ControlBird logo in the taskbar and select Rule Chain Editor. You'll see an empty canvas with a node palette on the left.
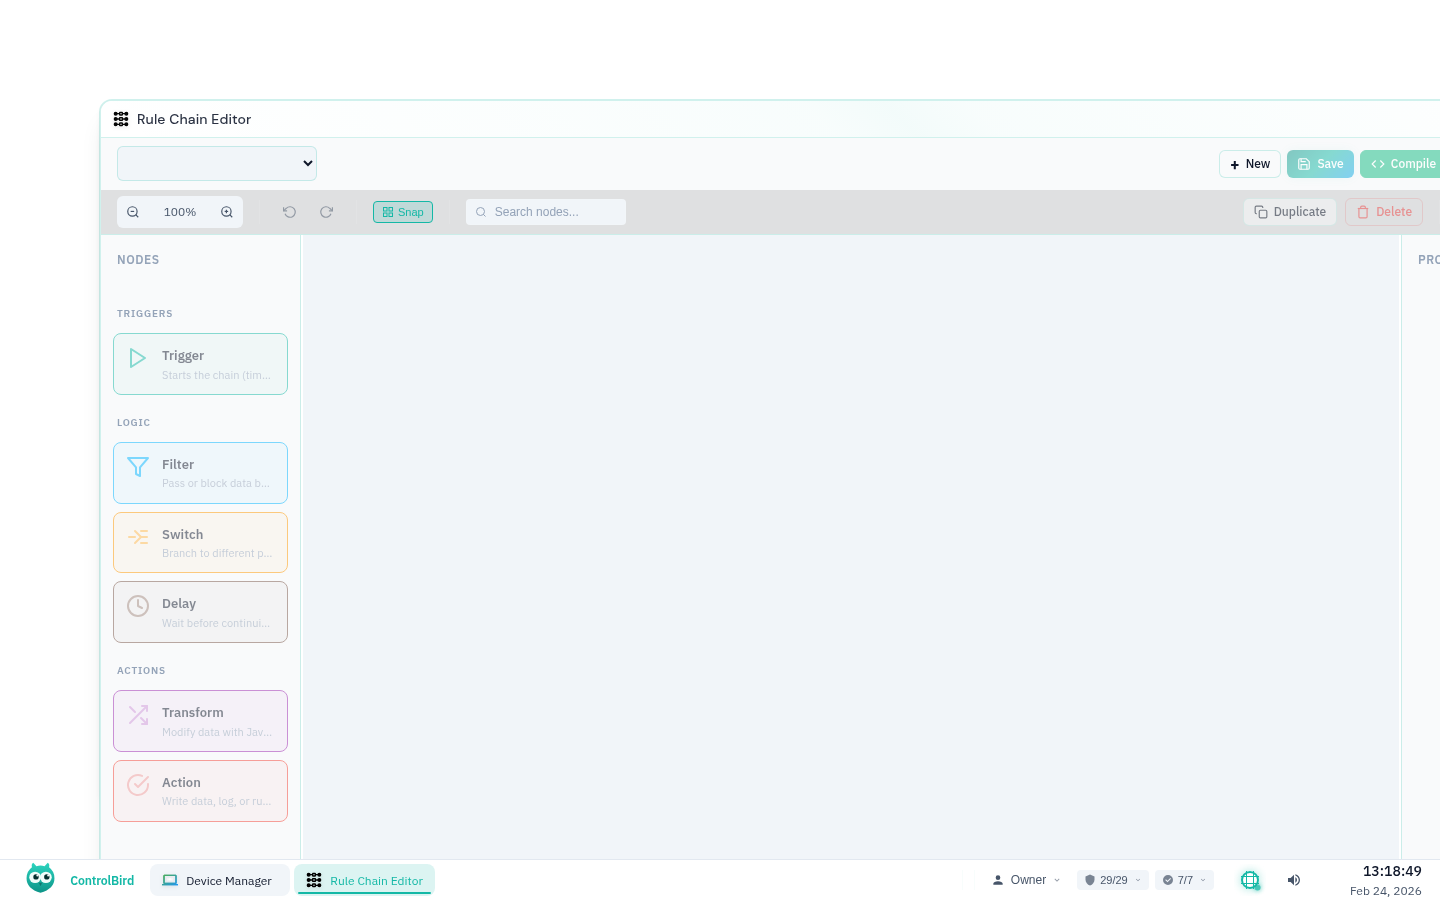
The Node Types
Nodes are grouped into three categories: a Trigger that starts the chain, logic nodes that filter and route data, and action nodes that do something when conditions are met. Here are the ones you'll use most:
Entry point. Defines what starts the chain (entity change, timer, or manual).
Passes or blocks data based on a condition. Has two outputs: true and false.
Modifies data using JavaScript. Reshape, calculate, or extract values.
Routes data to different paths based on multiple conditions.
Waits a specified time before passing data through.
An action node that writes a value to an entity field. Other action nodes include Create Entity and Log.
Example: Temperature Alert
Let's create a simple automation that triggers an alert when temperature exceeds 80°F. This demonstrates the core workflow of building a rule chain.
Step 1: Add a Trigger Node
Drag a Trigger node from the palette onto the canvas. This is the entry point that starts your chain.
Click the node to configure it in the properties panel:
| Property | Value | Why |
|---|---|---|
Trigger Type | Entity Change | Run when a field value changes |
Entity Type | TemperatureSensor | Watch entities of this type |
Field | Temperature | Trigger on this specific field |

Step 2: Add a Filter Node
Drag a Filter node onto the canvas, to the right of the Trigger node. Connect them by dragging from the Trigger's output socket to the Filter's input socket.
Configure the Filter condition:
data.value > 80This means: "only pass data through if the temperature value is greater than 80." The Filter has two outputs: true (condition met) and false (condition not met).
JavaScript Expressions
Filter conditions are JavaScript expressions. The data variable contains the incoming data. You can use any JavaScript: data.value >= 100, data.status === 'active', or even data.temp > 80 && data.humidity < 50.
Step 3: Add a Write Field Action
Drag a Write Field node and connect it to the Filter's true output. This action only runs when the temperature exceeds 80.
Configure the action:
| Property | Value |
|---|---|
Target Entity | /Alerts/TemperatureAlert |
Field | Triggered |
Value | true |

Step 4: Compile and Test
Click the Compile button in the toolbar. The editor validates your chain and generates executable code. If there are errors (missing connections, invalid expressions), they'll appear in the status bar.
Click Execute to test your chain manually. You can also leave it running, and it will automatically trigger whenever your temperature sensor reports a new value.
Understanding Data Flow
Data flows through your chain like water through pipes:
{ value: 85 }Common Patterns
Pattern: Threshold with Hysteresis
Avoid rapid on/off switching by using two thresholds:
- Turn ON when temperature > 80
- Turn OFF when temperature < 75
Use a Switch node with multiple conditions instead of a single Filter.
Pattern: Data Transformation
Convert raw sensor values before storing:
return { celsius: (data.value - 32) * 5/9 };Pattern: Conditional Routing
Send data to different outputs based on value ranges using a Switch node:
data.value < 60→ "Cold" outputdata.value < 80→ "Normal" output- Default → "Hot" output
Keyboard Shortcuts
| Shortcut | Action |
|---|---|
| Delete | Delete selected nodes |
| Ctrl+Z | Undo |
| Ctrl+Shift+Z | Redo |
| Ctrl+A | Select all nodes |
| Escape | Deselect all |
| Ctrl+0 | Reset zoom |
Troubleshooting
My chain won't compile
Check these common issues:
- Missing Trigger node: Every chain needs exactly one Trigger
- Missing action node: Every chain needs at least one action node (such as Write Field)
- Disconnected nodes: Every node except the Trigger must have an incoming connection
- Syntax errors: Check your JavaScript expressions in Filter/Transform nodes
The chain compiled but nothing happens
Verify your trigger conditions:
- For Entity Change triggers: Is the entity/field you specified actually changing?
- For Timer triggers: Is the interval set correctly (in milliseconds)?
- Check Filter conditions: your data might be going to the "false" output
- Open the Logs app to see execution messages and errors
How do I debug what's happening?
Add Log nodes at different points in your chain. This prints the current data to the console, helping you see what values are flowing through. Open the Logs app to view the output.